

How To Repair Leather Or Vinyl
How to Repair Leather Tears and Holes
Updated: Feb. 20, 2022
Cheque out this leather repair guide for simple, DIY fix for tears and holes
Learn how to use inexpensive, DIY-friendly repair kits to fix modest tears in leather or vinyl auto seats and chairs earlier they get large and ugly.
You might also like: TBD
How to use a leather repair kit
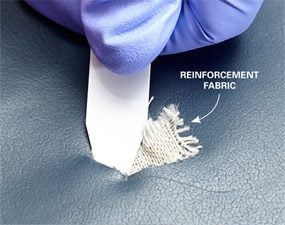
Photo one: Gum in the reinforcement material
Utilise a leather repair kit and tuck the backing under the damaged area to form a patch. Then utilise adhesive around the edges and the middle. Permit information technology dry out before calculation colorant.

Photo two: Cure the patch with heat
Touch the heating tool (included with the kit) to the confront of a hot apparel fe. Then press the hot tool onto the textured mat and hold it in place.
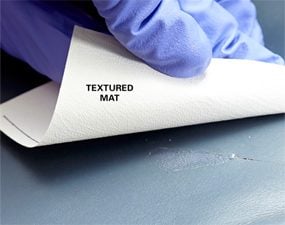
Photo iii: Check out the results
The patch won't be a perfect leather chair repair. But it certain beats the expect of a tear or fire.
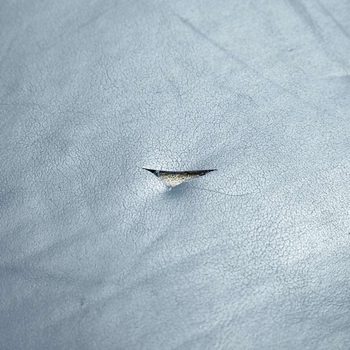
If you walk effectually with tools in your pockets, don't be surprised if you tear a hole in your leather automobile seat, sofa or like shooting fish in a barrel chair. If a perfect leather chair repair is important, call a pro to fix information technology (about $150). But if you just desire to prevent farther tearing, you lot can fix it yourself with a leather/vinyl repair kit. The leather repair kit is inexpensive, and a leather chair repair takes simply an 60 minutes. But don't expect perfection when you effort to set a leather motorcar seat. You'll still run across the tear after the leather seat repair, and you probably won't go a perfect color match. However, this fix will incorporate the tear and expect better than a gaping hole.
Buy a leather repair kit at any hardware shop, dwelling center or auto parts store (one choice is the 3M Leather and Vinyl Repair Kit). Follow the cleaning instructions in the kit and trim the damaged area to remove any frayed edges. Then cut the backing fabric so it extends under the tear by at least 1/two in. Glue it in place (Photo 1) and let it dry for the recommended time.
Then mix the heat-set colored filler. This is the hardest and well-nigh frustrating role of the repair. Just have your time and get as shut to the colour as you can. Apply merely enough colorant to fill in the tear. Then cover information technology with the textured mat and apply estrus (Photo 2). Allow it cool and remove the mat (Photograph 3).

Required Materials for this Leather Repair Project
Avoid terminal-minute shopping trips past having all your materials ready ahead of time for leather repair. Here'south a list.
Originally Published: Dec 10, 2022

How To Repair Leather Or Vinyl,
Source: https://www.familyhandyman.com/project/how-to-repair-leather/
Posted by: beusbeffight.blogspot.com
0 Response to "How To Repair Leather Or Vinyl"
Post a Comment